
Burp suite is a penetrating testing tool that provides services such as Target, Proxy, Intruder and etc.
In this report, we will focus on the proxy, the proxy services in the Burpsuite include the function to intercept, inspect and modify the traffic that is happening between the end-devices application such as browser and the application server.
1. Set the proxy server of the End-device application
Before we start to intercept, inspect and modify the traffic we will need to configure the end-devices application’s to use the same proxy server that is connected to the burp suite listener. For example, in Mozzila Firefox browsers go to the preferences/general setting and click on the connection setting. A pop-up menu will come out, on the pop-up menu click on the manual proxy configurations to use a manual proxy server which is the same with the proxy server provided by Burpsuite. In this example, we are using the default Burpsuite’s proxy server IP 127.0.01.
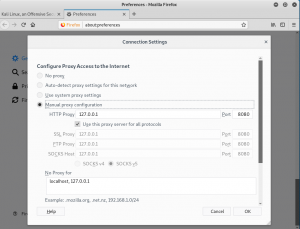
figure 1.1 burpsuite1
- Create Custom SSL to bypass secure connection
By default, if the end-devices try to request to any HTTPS web-application server without any SSL certificate, they will get a security error response. To fix this we will need to install the SSL certificate on the end-devices. In this example, we will use a custom SSL to fix this problem.
First of all, type in the following command on the terminal
![]()
figure 2.1 command1
After typing in the command, the terminal will ask for data needed to create the SSL
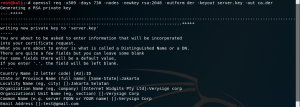
figure 2.2 command2
Secondly, type in the command below and it will generate the new SSL key
![]()
figure 2,3 command3
Thirdly, type in the command below to export the SSL into .der file
![]()
figure 2.4 command 4
- Import the custom SSL to both Burpsuite and End-device application/browser
First of all, run the Burpsuite application and go to the Proxy tab, click on the option sub-tab
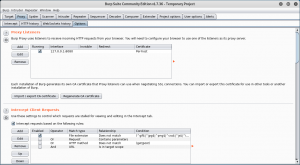
figure 1.2 burp2
Secondly, click on the “import/ export CA certificate” button, and “Cert and key in DER format”. Select ca.der as the certificate file, and server.key.pkcs8.der as the key file. Burp will then load the custom CA certificate and begin using it to generate per-host certificates.
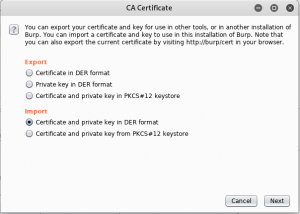
figure 1.3 burp3
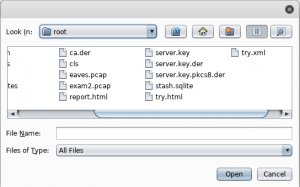
figure 1.4 burp4
On the browser side, we will need to import the ca.der file as the SSL, this can be done by clicking on the preferences/privacy & security. Click on the import and import the file “ca.der”
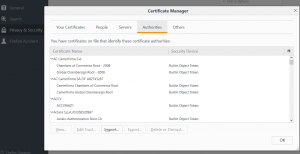
figure 1.5 burp5
4.Proof
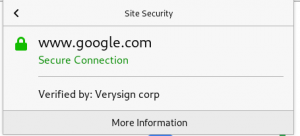
figure 3.1 proof
As we can see the image now the connection is secure and verified by Verisign corp